Introduction
If you own an Apple device, you have probably asked at least one of these questions: Is my iPhone getting the new update? How do I move my stuff from Android? Why won’t my phone connect to Wi-Fi?
You are not alone. Millions of Apple users search for clear, practical answers every day. This guide brings those answers together in one place. It covers the most common Apple ecosystem topics, from checking compatibility to backing up your data and keeping your device secure.
You do not need to be a tech expert to follow along. Everything here is explained in plain English, with step-by-step instructions and real settings paths you can actually find on your device. Let’s start with the questions people ask most.
iOS 27 Compatible iPhones: Is Your Device on the List?
When Apple releases a new version of iOS, the first question is always the same: does my iPhone support it?
For iOS 27, the answer is simpler than you might expect. According to Apple’s announcement at WWDC 2026, every iPhone that runs iOS 26 can also run iOS 27 . That means if your phone received last year’s major update, it is eligible for this one too.
Here is the complete list of supported models:
iPhone 18 Series: iPhone 18 Pro, iPhone 18 Pro Max, iPhone Duo
iPhone 17 Series: iPhone 17, iPhone 17 Pro, iPhone 17 Pro Max, iPhone 17e, iPhone Air
iPhone 16 Series: iPhone 16, iPhone 16 Plus, iPhone 16 Pro, iPhone 16 Pro Max, iPhone 16e
iPhone 15 Series: iPhone 15, iPhone 15 Plus, iPhone 15 Pro, iPhone 15 Pro Max
iPhone 14 Series: iPhone 14, iPhone 14 Plus, iPhone 14 Pro, iPhone 14 Pro Max
iPhone 13 Series: iPhone 13, iPhone 13 mini, iPhone 13 Pro, iPhone 13 Pro Max
iPhone 12 Series: iPhone 12, iPhone 12 mini, iPhone 12 Pro, iPhone 12 Pro Max
iPhone 11 Series: iPhone 11, iPhone 11 Pro, iPhone 11 Pro Max
iPhone SE: iPhone SE (2nd generation and later)
A Critical Difference: Compatibility vs. Features
Here is something many people miss. Your iPhone may be compatible with iOS 27, but that does not mean it gets every feature.
Apple Intelligence, the company’s suite of AI-powered tools, requires specific hardware. If you want access to Apple Intelligence features like the enhanced Siri, you need at least an iPhone 15 Pro or any iPhone 16 model or newer . The standard iPhone 15 and iPhone 15 Plus can install iOS 27, but they cannot use Apple Intelligence.
This distinction matters when you are deciding whether to update or upgrade. If your iPhone 11, 12, 13, or 14 is working well, installing iOS 27 will bring security fixes and general improvements, but it will not unlock the new AI tools. If those tools are important to you, that is a hardware limitation, not a software one.
Should I Update to iOS 27?
The answer depends on your situation. Here is a practical way to think about it:
Update if: Your device is compatible, you have a recent backup, and you want the latest security patches and bug fixes.
Wait if: You rely on a specific app that has not yet been updated for iOS 27, or your device is running low on storage.
Do not update solely for AI features if your iPhone is older than the iPhone 15 Pro. The update will install, but Apple Intelligence will not appear.
Before you tap that update button, Osnivo’s Should I Update Tool can help you weigh the decision based on your exact device and needs. If you want to verify compatibility first, the Apple Device Compatibility Checker gives you a clear answer without guessing.
macOS 27 Compatible Macs: The End of Intel Support
The story for Macs is different from iPhones, and the change is significant.
macOS 27 Golden Gate is the first major macOS release that requires Apple silicon . If you have an Intel-based Mac, regardless of how recent it is, macOS 27 will not install.
Apple’s official compatibility list covers every Mac with an M-series chip. Here is the breakdown by category:
MacBook Pro: All models from the M1 (2020) through the M6 and M5 Pro/Max generations
MacBook Air: All models from M1 (2020) through M5
MacBook Neo: The 13-inch model with A18 Pro
iMac: All models from M1 (2021) through M6
Mac mini: All models from M1 (2020) through M6/M5 Pro
Mac Studio: All models from 2022 through M5 Max/Ultra
If your Mac is not on this list, you can still use an earlier version of macOS. You are not locked out of your computer. But you will not receive macOS 27 security updates or features.
To check where your Mac stands, Osnivo’s Version Compare tool lets you see exactly what your current macOS version supports and what you would gain or lose by staying put.
How to Set Up a New iPhone: A Beginner’s Walkthrough
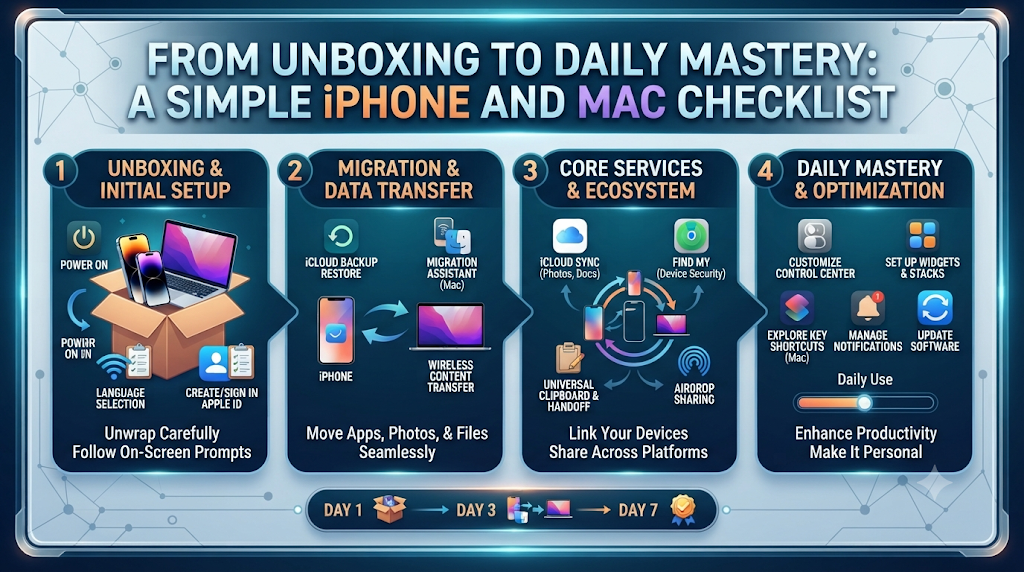
Setting up a new iPhone should feel exciting, not overwhelming. Whether this is your first iPhone or your fifth, the process follows the same general path.
Before You Begin
Make sure you have:
- A stable Wi-Fi connection
- Your Apple ID and password ready
- Your previous phone nearby if you are transferring data
- At least 30 minutes of uninterrupted time
Step-by-Step Setup
- Turn on your iPhone by pressing and holding the side button until the Apple logo appears.
- Choose your language and region. These settings affect how dates, times, and some features work.
- Connect to Wi-Fi. You can use cellular later, but Wi-Fi makes the setup and any data transfer faster.
- Set up Face ID or Touch ID. You can skip this step and add it later in Settings, but setting it up now saves time.
- Sign in with your Apple ID. If you do not have one, you can create one during setup. This account connects you to iCloud, the App Store, and Apple’s services.
- Choose your data transfer option. You will see options to transfer from iCloud backup, transfer from another iPhone, move data from Android, or set up as new.
- Follow the remaining prompts for settings like Siri, location services, and analytics.
If this is your first time and you want a guided companion, Osnivo’s Setup Companion walks you through each screen with explanations of what each choice actually means, so you are not just tapping “Next” without understanding.
Transfer Data from Android to iPhone: Your Options
Switching from Android to iPhone has become much smoother than it used to be, but the method you choose matters.
Move to iOS: The Official Tool
Apple’s Move to iOS app is the most complete solution for transferring data during iPhone setup. It moves contacts, messages, photos, videos, calendars, email accounts, and even WhatsApp chats .
Important limitation: Move to iOS only works during the initial setup of your iPhone. If you have already completed setup, you would need to erase your iPhone and start over to use this tool.
To use it:
- Download Move to iOS from the Google Play Store on your Android phone.
- During iPhone setup, choose “Move Data from Android” when you reach the Apps & Data screen.
- Open the app on Android and enter the code shown on your iPhone.
- Select the content you want to transfer and wait for it to complete.
Recent updates also support a USB-C cable transfer on compatible devices, which is faster than the wireless method .
Other Transfer Methods
If you have already set up your iPhone or only need specific types of data, here are alternatives:
Google Account sync: Sign into your Google account on your iPhone under Settings > Contacts > Accounts to bring over contacts and calendars.
Google Photos: If your Android photos were backed up to Google Photos, simply install the app on your iPhone and sign in.
Cloud storage: Services like Google Drive or Dropbox let you upload files from Android and download them on iPhone.
For a personalized migration plan based on what you actually need to move, Osnivo’s Migration Planner helps you choose the right method without transferring unnecessary data.
iPhone Won’t Connect to Wi-Fi: Practical Fixes
Few things are more frustrating than a phone that will not connect when you need it. The good news is that most Wi-Fi problems on iPhone have simple solutions.
Start With the Basics
Before diving into settings, check these:
- Is Wi-Fi actually on? Open Control Center and confirm the Wi-Fi icon is blue.
- Is the password correct? Passwords are case-sensitive.
- Is the router working? Try connecting another device to the same network.
Step-by-Step Troubleshooting
1. Toggle Airplane Mode
Turn Airplane Mode on for 30 seconds, then turn it off. This forces your iPhone to re-establish all wireless connections .
2. Restart Your iPhone
A simple restart clears temporary glitches that can interfere with Wi-Fi.
3. Forget and Rejoin the Network
Go to Settings > Wi-Fi, tap the “i” icon next to the network name, and select “Forget This Network.” Then reconnect with the password .
4. Restart Your Router
Unplug your router for 30 seconds, then plug it back in. Wait for it to fully restart before trying to connect.
5. Reset Network Settings
Go to Settings > General > Transfer or Reset iPhone > Reset > Reset Network Settings. Warning: This erases all saved Wi-Fi passwords and Bluetooth connections. You will need to reconnect to networks afterward .
6. Update iOS
Go to Settings > General > Software Update. Apple frequently releases fixes for connectivity bugs.
If these steps do not solve the problem, the issue may be with your router or your internet service provider rather than your iPhone. If you want a structured troubleshooting flow, Osnivo’s Osnivo Fix tool walks you through diagnostics based on your specific symptoms.
How to Back Up an iPhone: iCloud vs. Computer
A backup is your safety net. If your iPhone is lost, stolen, or damaged, a recent backup means you can restore your data instead of starting over.
iCloud Backup
iCloud is the most convenient option because it happens automatically.
To set it up:
- Go to Settings > [Your Name] > iCloud > iCloud Backup.
- Turn on “Back Up This iPhone.”
- Tap “Back Up Now” for an immediate backup.
Your iPhone will then back up automatically when it is connected to Wi-Fi, plugged in, and locked.
What iCloud backup includes: App data, device settings, messages, photos (unless iCloud Photos is enabled), and purchase history.
What it does not include: Data already stored in iCloud (like contacts, calendars, and notes), Apple Mail data, Face ID settings, and Apple Pay information.
Storage consideration: Free iCloud accounts get 5GB. If your backup is larger, you will need to purchase additional storage.
Computer Backup (Mac or PC)
A local backup on your computer is faster and gives you more control.
On a Mac with macOS Catalina or later:
- Connect your iPhone to your Mac with a USB cable.
- Open Finder and select your iPhone from the sidebar.
- Under the General tab, choose “Back up all of the data on your iPhone to this Mac.”
- Click “Back Up Now.”
On Windows or older Macs: The process is similar, but you use iTunes or the Apple Devices app instead of Finder.
Important: If you want to back up Health data and saved passwords, check “Encrypt local backup” and create a password. Without encryption, this sensitive data is excluded.
Osnivo’s Backup Planning Resources can help you decide which method fits your storage situation and how often you should back up.
iPhone Security Settings Checklist
Your iPhone holds a lot of personal information. A few minutes in Settings can significantly improve your protection.
Essential Security Settings
1. Use a Strong Passcode
Go to Settings > Face ID & Passcode (or Touch ID & Passcode). Use a 6-digit code or, better yet, an alphanumeric passcode. Avoid obvious numbers like birthdays.
2. Enable Stolen Device Protection
This feature requires Face ID or Touch ID for sensitive actions like changing your Apple ID password or viewing saved passwords, even if someone knows your passcode. Turn it on under Settings > Face ID & Passcode > Stolen Device Protection .
3. Review App Permissions
Go to Settings > Privacy & Security. Check which apps have access to your location, microphone, camera, contacts, and photos. Revoke access for any app that does not genuinely need it.
4. Turn On Find My iPhone
This helps you locate a lost device and prevents anyone else from activating it. Go to Settings > [Your Name] > Find My > Find My iPhone.
5. Check Password Security
Go to Settings > Passwords. iOS alerts you to weak, reused, or compromised passwords. Address any warnings you see.
6. Enable Two-Factor Authentication for Your Apple ID
This is likely already on if you created your Apple ID recently, but verify under Settings > [Your Name] > Sign-In & Security.
7. Consider Lockdown Mode for High-Risk Situations
If you believe you are specifically targeted by sophisticated attacks (journalists, activists, executives), Lockdown Mode under Settings > Privacy & Security offers extreme protection at the cost of some functionality .
Osnivo’s Security Checkups tool provides a guided review of these settings and flags anything you might have missed.
QuickTime Player Screen Recording on Mac
QuickTime Player is already on your Mac, and it can record your screen without any additional software.
How to Record Your Screen
- Open QuickTime Player from your Applications folder.
- From the menu bar, choose File > New Screen Recording (or press Control-Command-N) .
- Click the arrow next to the Record button to adjust settings:
- Choose a microphone if you want to record audio
- Enable “Show Mouse Clicks in Recording” for tutorials
- Click Record, then click anywhere on the screen to record the full screen, or drag to select an area.
- To stop, click the Stop button in the menu bar or press Command-Control-Esc.
Your recording opens automatically in QuickTime Player, where you can play, trim, or share it.
Note: On newer versions of macOS, screen recording may be handled by the Screenshot app instead. If you see a different interface when you choose New Screen Recording, follow the on-screen controls for that app .
For a quick tutorial on recording without opening QuickTime, you can also press Shift-Command-5 to bring up the Screenshot toolbar, which includes recording options.
iPhone Settings Guide: Where to Find What You Need
Apple’s Settings app is organized, but it is also deep. Here is a quick reference for the most commonly needed settings.
| What You Want to Change | Where to Find It |
|---|---|
| Wi-Fi network | Settings > Wi-Fi |
| Bluetooth devices | Settings > Bluetooth |
| Cellular data options | Settings > Cellular |
| Notifications per app | Settings > Notifications |
| Screen brightness | Settings > Display & Brightness |
| Wallpaper | Settings > Wallpaper |
| Face ID / Passcode | Settings > Face ID & Passcode |
| Battery health | Settings > Battery > Battery Health |
| Software update | Settings > General > Software Update |
| Storage usage | Settings > General > iPhone Storage |
| Privacy permissions | Settings > Privacy & Security |
If you ever forget where a setting lives, Osnivo’s Settings Pathfinder lets you search by what you want to do, and it shows you the exact menu path.
Common Mistakes Apple Users Make
Even experienced users fall into these traps. Avoiding them saves time and prevents data loss.
Updating without checking compatibility. Always verify that your device supports the new OS before updating. More importantly, check whether the features you want are available on your specific model.
Skipping backups before major changes. Whether you are updating iOS, resetting your device, or switching phones, a recent backup is essential. Without one, a problem becomes a disaster.
Using instructions for the wrong OS version. Settings paths change between iOS versions. A guide written for iOS 16 may not match what you see on iOS 27.
Ignoring security settings. The default settings are reasonable, but they are not optimized for your specific risk profile. Taking five minutes to review privacy and security options is worth it.
Resetting a device without understanding what gets erased. “Reset All Settings” and “Erase All Content and Settings” do very different things. Know which one you are choosing.
Assuming every feature works on every device. Apple Intelligence is the clearest current example, but this has always been true. Feature availability depends on hardware, region, and language.
Frequently Asked Questions
Is my iPhone 11 compatible with iOS 27?
Yes. The iPhone 11, 11 Pro, and 11 Pro Max are all on Apple’s official compatibility list for iOS 27 .
Will iOS 27 make my older iPhone slower?
Major updates can affect performance on older devices, but iOS 27 runs on the same hardware as iOS 26. If your phone handled iOS 26 well, iOS 27 should perform similarly. Apple typically optimizes new software for recent hardware.
Can I downgrade from iOS 27 back to iOS 26?
Apple usually stops signing older iOS versions shortly after a new release. Once that happens, downgrading is no longer possible through official means. Check Apple’s signing status before updating if you think you might want to revert.
Does macOS 27 work on Intel Macs?
No. macOS 27 requires Apple silicon. Intel Macs are not supported for this release .
How long does Move to iOS take?
It depends on how much data you are transferring. A small transfer might take 10–15 minutes. Large photo libraries and message histories can take an hour or more. Keep both devices plugged in and close together during the process.
Can I use Move to iOS after my iPhone is already set up?
Not without erasing your iPhone and starting over. Move to iOS only works during the initial setup process. For an already-configured iPhone, you would need to transfer data manually or use cloud services.
What is the difference between iCloud backup and a computer backup?
iCloud backups are wireless and automatic, but limited by your iCloud storage. Computer backups are faster, not limited by cloud storage, and can include encrypted data like Health and passwords, but they require a cable and manual initiation.
Why does my iPhone keep disconnecting from Wi-Fi?
Common causes include router issues, outdated iOS, network settings corruption, or interference. Start with forgetting and rejoining the network, then restart your router, then reset network settings if the problem persists.
Does QuickTime Player record internal Mac audio?
No. QuickTime Player can record from a microphone, but it cannot capture your Mac’s internal system audio without third-party software .
Is Stolen Device Protection worth enabling?
Yes, for most users. It adds a critical layer of security with minimal inconvenience. The only time you might disable it is if you frequently need to make account changes in situations where Face ID is impractical.
Conclusion
The Apple ecosystem is powerful, but it is also complex. Compatibility lists change every year, settings move between updates, and new features come with hardware requirements that are not always obvious.
The key is to start with clear information. Know whether your device supports the update before you install it. Understand what data transfer method fits your situation. Take a few minutes to review your security settings. And always, always have a recent backup.
