Introduction
Have you ever encountered a broken URL while working with Laravel? It can be frustrating, especially when you’re trying to build a dynamic web application. In this article, we will explore how to check if the current dynamic request URL is broken in Laravel, and we’ll provide a live example to help you understand the concept better.
Understanding the Problem
Before we dive into the solution, let’s first understand what a broken URL is. A broken URL is a URL that leads to a webpage or resource that does not exist or cannot be accessed. This can happen due to various reasons such as incorrect routing, missing files, or database errors.
Step 1:- Create a route
Route::post('/guest_post_store', [App\Http\Controllers\Admin\GuestPostAdminController::class, 'guest_post'])->name('guest_post_store');Step 2:- Create a controller
public function guest_post(Request $request)
    {
        log::info("guest_post id me guest_post aa rha hai.");
        $adminId = auth()->user()->id;
        log::info('Request Data:', $request->all());
        $url = $request->input('url');
        $title = $request->input('title');
        $admin_id = $request->input('admin_id');
        $admin_email = $request->input('admin_email');
        $u_org_slugname = $request->input('u_org_slugname');
        $u_org_organization_id = $request->input('u_org_organization_id');
        $u_org_role_id = $request->input('u_org_role_id');


        // Perform any validation or processing on the URL if needed

        // Check if the URL is working (you may need to customize this logic)
        $isUrlWorking = $this->checkIfUrlIsWorkingWithGuzzle($url);

        // Update the database based on the status
        $newGuestPost = Guest_post::updateOrCreate(
            ['title' => $title], // Use the actual column name in your table
            [
                'url' => $url,
                'admin_id' => $adminId,
                'admin_email' => $admin_email,
                'u_org_slugname' => $u_org_slugname,
                'u_org_organization_id' => $u_org_organization_id,
                'u_org_role_id' => $u_org_role_id,
                'status' => $isUrlWorking
            ]
        );
        $guestPosts = Guest_post::all();
        return response()->json(['success' => true, 'message' => 'URL status updated successfully', 'data' => $guestPosts]);

    }

    private function checkIfUrlIsWorkingWithGuzzle($url)
    {
        $client = new Client();

        try {
            $response = $client->get($url);
            return $response->getStatusCode() === 200;
        } catch (\Exception $e) {
            return false;
        }
    }
Step 3:- Create a blade page
<form method="post" id="sample_form" class="form-horizontal" enctype="multipart/form-data">
                                            @csrf
                                            <div class="form-group" id="name_form">
                                                <label class="control-label col-md-4">Title :- </label>
                                                <div class="col-md-12">
                                                    <input type="text" name="title" id="title" class="form-control" autocomplete="off" />
                                                    <!-- <span id="username" class="text-danger"></span> -->
                                                </div>
                                            </div>
                                            <div class="form-group" id="name_form">
                                                <label class="control-label col-md-4">URL :- </label>
                                                <div class="col-md-12">
                                                    <input type="url" name="url" id="url" class="form-control" autocomplete="off" />
                                                    <!-- <span id="username" class="text-danger"></span> -->
                                                </div>
                                            </div>
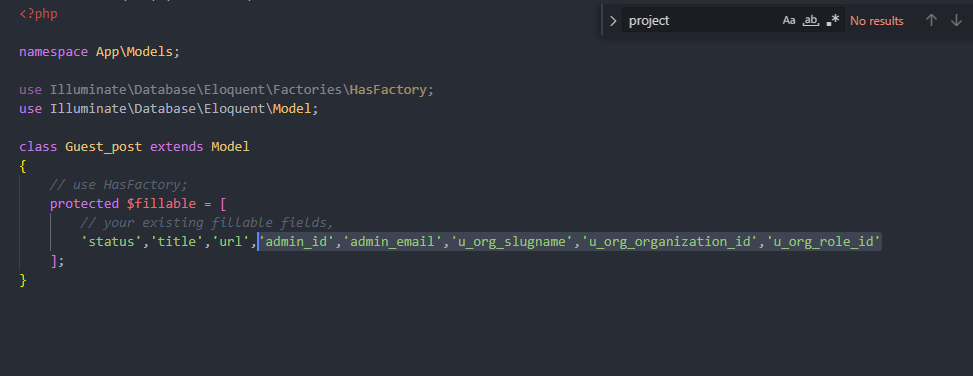
Step 4:- Create a model
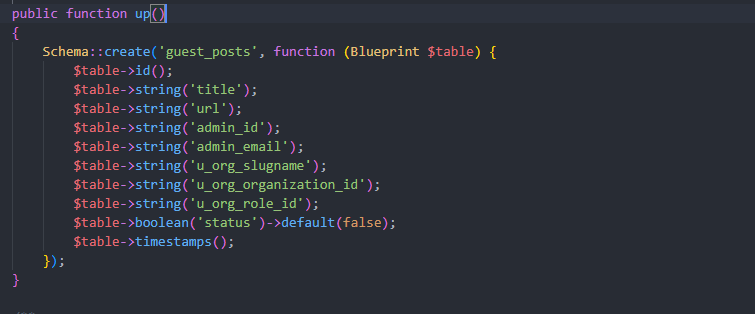
Step 5:- Create a table
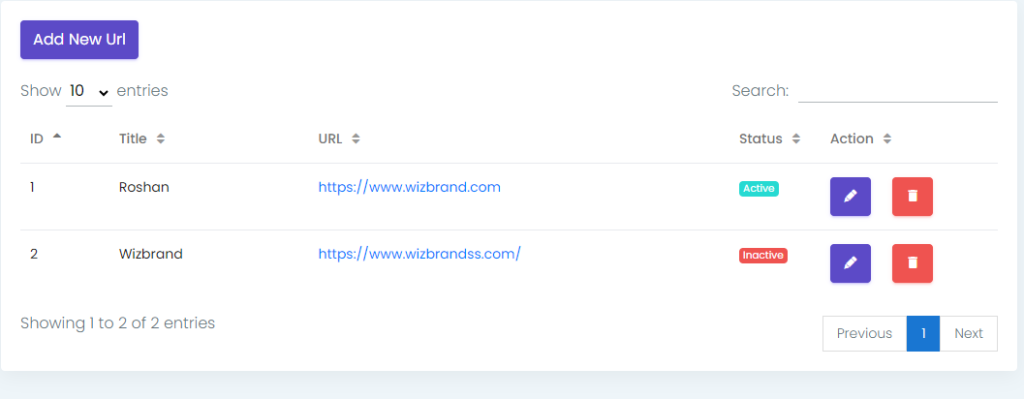
Output:-
As per your requirement change in code.
