Introduction
Have you ever wondered how to clone a Git repository into a specific folder? Well, you’re in luck! In this article, we will explore the step-by-step process of cloning a Git repository into a specific folder, complete with examples. So, grab your keyboard, and let’s get started!

Step 1: Open your Terminal
First things first, open your terminal. If you’re using a Mac, you can find it in the Utilities folder within the Applications folder. If you’re using Windows, you can open the Command Prompt or Git Bash.
Step 2: Navigate to the Desired Folder
Once your terminal is open, navigate to the folder where you want to clone the Git repository. You can use the cd command followed by the directory path to navigate to the desired folder. For example, if you want to clone the repository into a folder called “my-project”, you would use the following command:
cd /path/to/my-project
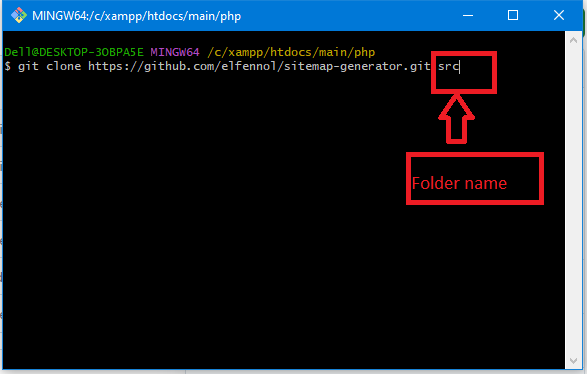
Step 3: Clone the Git Repository
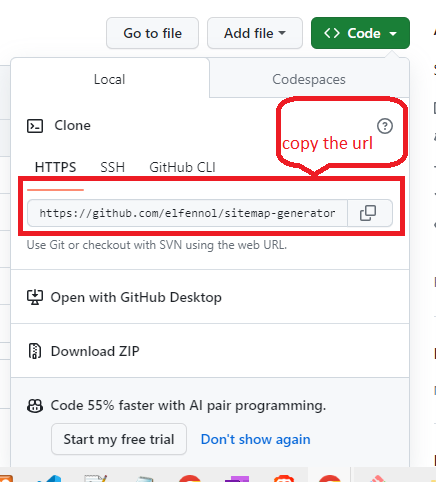
Now that you’re in the desired folder, it’s time to clone the Git repository. To do this, you will need the URL of the repository. If you don’t have the URL, you can usually find it on the repository’s page on GitHub or another Git hosting platform.
To clone the repository, use the git clone command followed by the repository URL. For example:
git clone https://github.com/elfennol/sitemap-generator.git folder_name
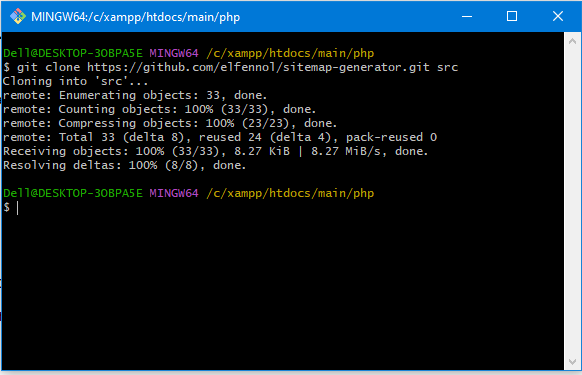
Step 4: Verify the Cloned Repository
Once the cloning process is complete, you can verify that the repository has been successfully cloned into the specific folder. Use the ls command to list the files and folders in the current directory. You should see the repository folder listed.

I hope this blog will help you !!!!