In this tutorial im going to learn how to integrate Login with OTP Authentication in Laravel. I will create step by step simple example of firebase phone auth in laravel 8. we will create firebase app and give login with phone enable. then we will write simple code to mobile verification(opt) in laravel.
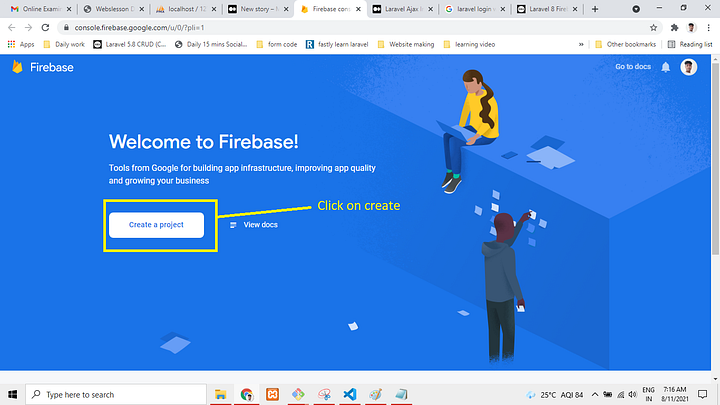
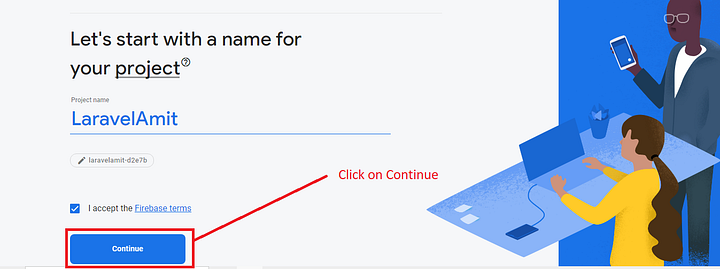
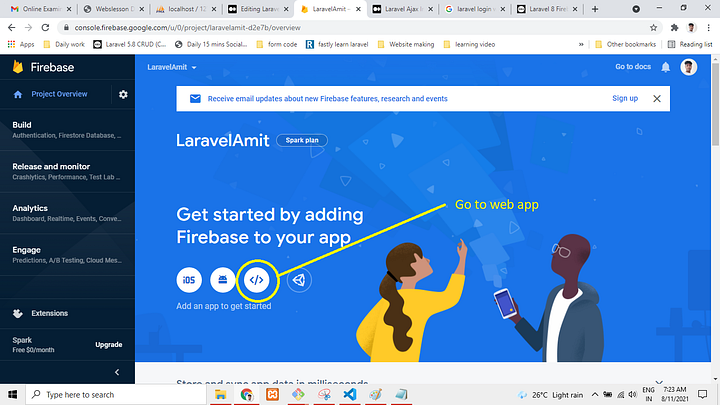
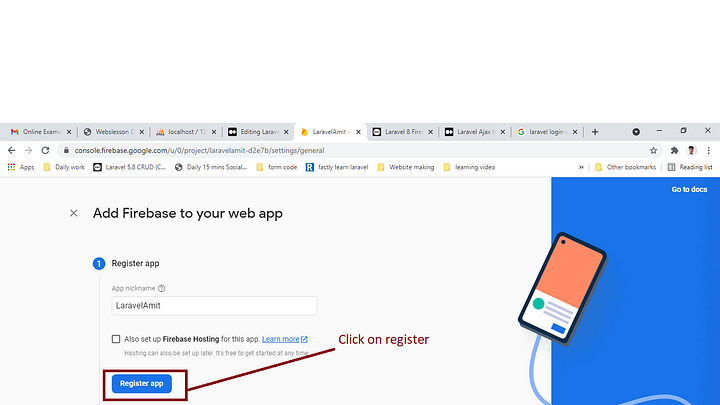
First of all create firebase Project and APP. Go through below URL and create web app on that project as like i added bellow screenshot.
FireBase
AS preview
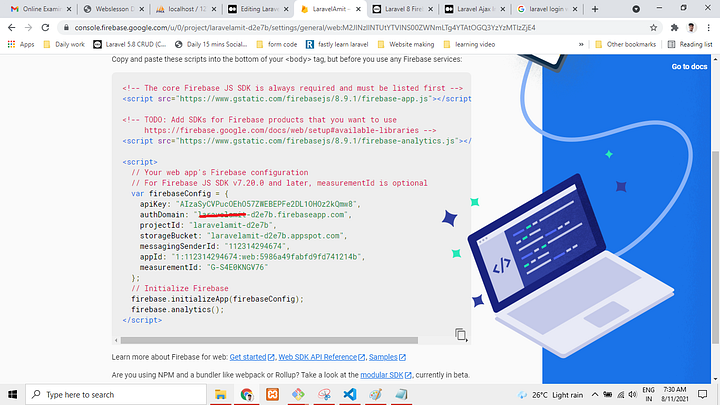
After given name and next then you will received firebase sdk as like bellow screen shot:
Next you need to enable phone number auth from bellow link:
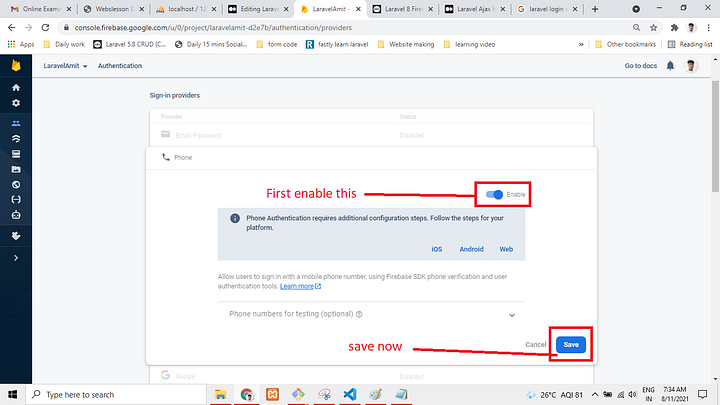
You have to save that all information because we will use in our app.
Next to Install laravel Project
composer create-project --prefer-dist laravel/laravel otp
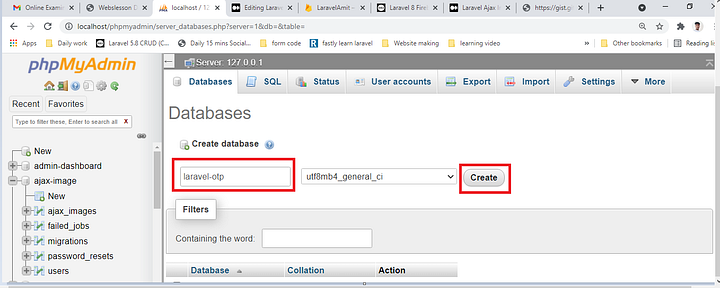
lets go to .env folder and put database name and connect to database.
DB_CONNECTION=mysqlDB_HOST=127.0.0.1DB_PORT=3306DB_DATABASE=ajax-imageDB_USERNAME=rootDB_PASSWORD=
Here, we need to add one route with FirebaseController controller so let’s add that route in web.php file.
routes/web.php
<?php use Illuminate\Support\Facades\Route;use App\Http\Controllers\FirebaseController; /*|--------------------------------------------------------------------------| Web Routes|--------------------------------------------------------------------------|| Here is where you can register web routes for your application. These| routes are loaded by the RouteServiceProvider within a group which| contains the "web" middleware group. Now create something great!|*/ Route::get('firebase-phone-authentication', [FirebaseController::class, 'index']);
Next to Create Controller Run below command
php artisan make:controller FirebaseController
Go to your controller and paste below code
<?php namespace App\Http\Controllers; use Illuminate\Http\Request; class FirebaseController extends Controller{ /** * Write code on Method * * @return response() */ public function index() { return view('firebase'); }}
Next to create Blade
resources/views/firebase.blade.php
<html>
<head>
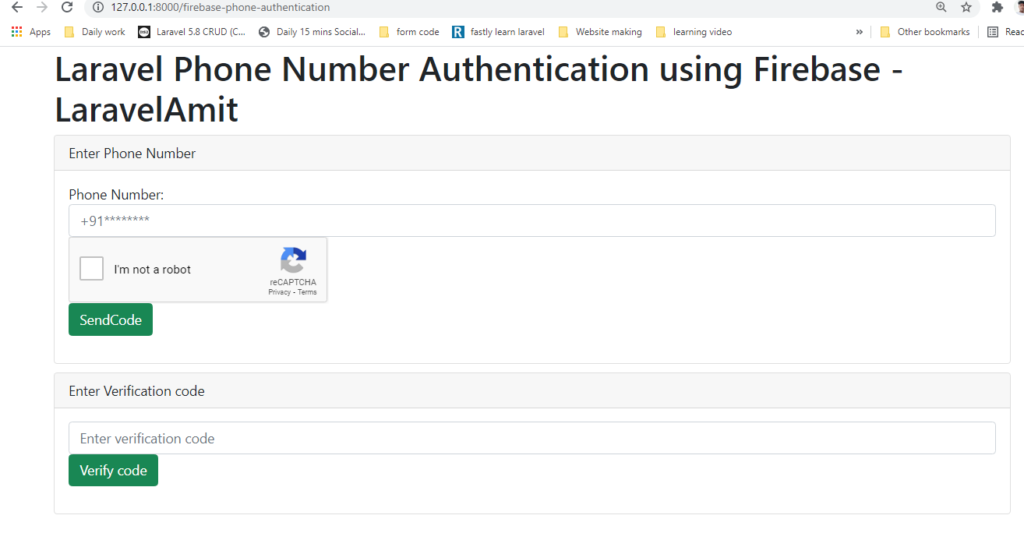
<title>Laravel Phone Number Authentication using Firebase - LaravelAmit</title>
<!-- CSS only -->
<link href="https://cdn.jsdelivr.net/npm/bootstrap@5.0.0-beta2/dist/css/bootstrap.min.css" rel="stylesheet">
<script src="https://cdnjs.cloudflare.com/ajax/libs/jquery/3.6.0/jquery.min.js"></script>
</head>
<body>
<div class="container">
<h1>Laravel Phone Number Authentication using Firebase - LaravelAmit</h1>
<div class="alert alert-danger" id="error" style="display: none;"></div>
<div class="card">
<div class="card-header">
Enter Phone Number
</div>
<div class="card-body">
<div class="alert alert-success" id="sentSuccess" style="display: none;"></div>
<form>
<label>Phone Number:</label>
<input type="text" id="number" class="form-control" placeholder="+91********">
<div id="recaptcha-container"></div>
<button type="button" class="btn btn-success" onclick="phoneSendAuth();">SendCode</button>
</form>
</div>
</div>
<div class="card" style="margin-top: 10px">
<div class="card-header">
Enter Verification code
</div>
<div class="card-body">
<div class="alert alert-success" id="successRegsiter" style="display: none;"></div>
<form>
<input type="text" id="verificationCode" class="form-control" placeholder="Enter verification code">
<button type="button" class="btn btn-success" onclick="codeverify();">Verify code</button>
</form>
</div>
</div>
</div>
<script src="https://www.gstatic.com/firebasejs/6.0.2/firebase.js"></script>
<script>
var firebaseConfig = {
apiKey: "AIzaSyBPdVwUIYOY0qRr9kbIMTnxKpFw_nkneYk",
authDomain: "itdemo-push-notification.firebaseapp.com",
databaseURL: "https://itdemo-push-notification.firebaseio.com",
projectId: "itdemo-push-notification",
storageBucket: "itdemo-push-notification.appspot.com",
messagingSenderId: "257055232313",
appId: "1:257055232313:web:3f09127acdda7298dfd8e8",
measurementId: "G-VMJ68DFLXL"
};
firebase.initializeApp(firebaseConfig);
</script>
<script type="text/javascript">
window.onload=function () {
render();
};
function render() {
window.recaptchaVerifier=new firebase.auth.RecaptchaVerifier('recaptcha-container');
recaptchaVerifier.render();
}
function phoneSendAuth() {
var number = $("#number").val();
firebase.auth().signInWithPhoneNumber(number,window.recaptchaVerifier).then(function (confirmationResult) {
window.confirmationResult=confirmationResult;
coderesult=confirmationResult;
console.log(coderesult);
$("#sentSuccess").text("Message Sent Successfully.");
$("#sentSuccess").show();
}).catch(function (error) {
$("#error").text(error.message);
$("#error").show();
});
}
function codeverify() {
var code = $("#verificationCode").val();
coderesult.confirm(code).then(function (result) {
var user=result.user;
console.log(user);
$("#successRegsiter").text("you are register Successfully.");
$("#successRegsiter").show();
}).catch(function (error) {
$("#error").text(error.message);
$("#error").show();
});
}
</script>
</body>
</html>
So let’s run project using this command:
php artisan serve